How to get Basic access to the Google Ads API
This guide takes you from Explorer to Basic access in the Google Ads API. It takes about 20 minutes, most of which is a one-off preparation of your website.
Why raise the level
The access level decides how many operations a day you can run on your real advertising accounts, and which parts of the API you can touch at all.
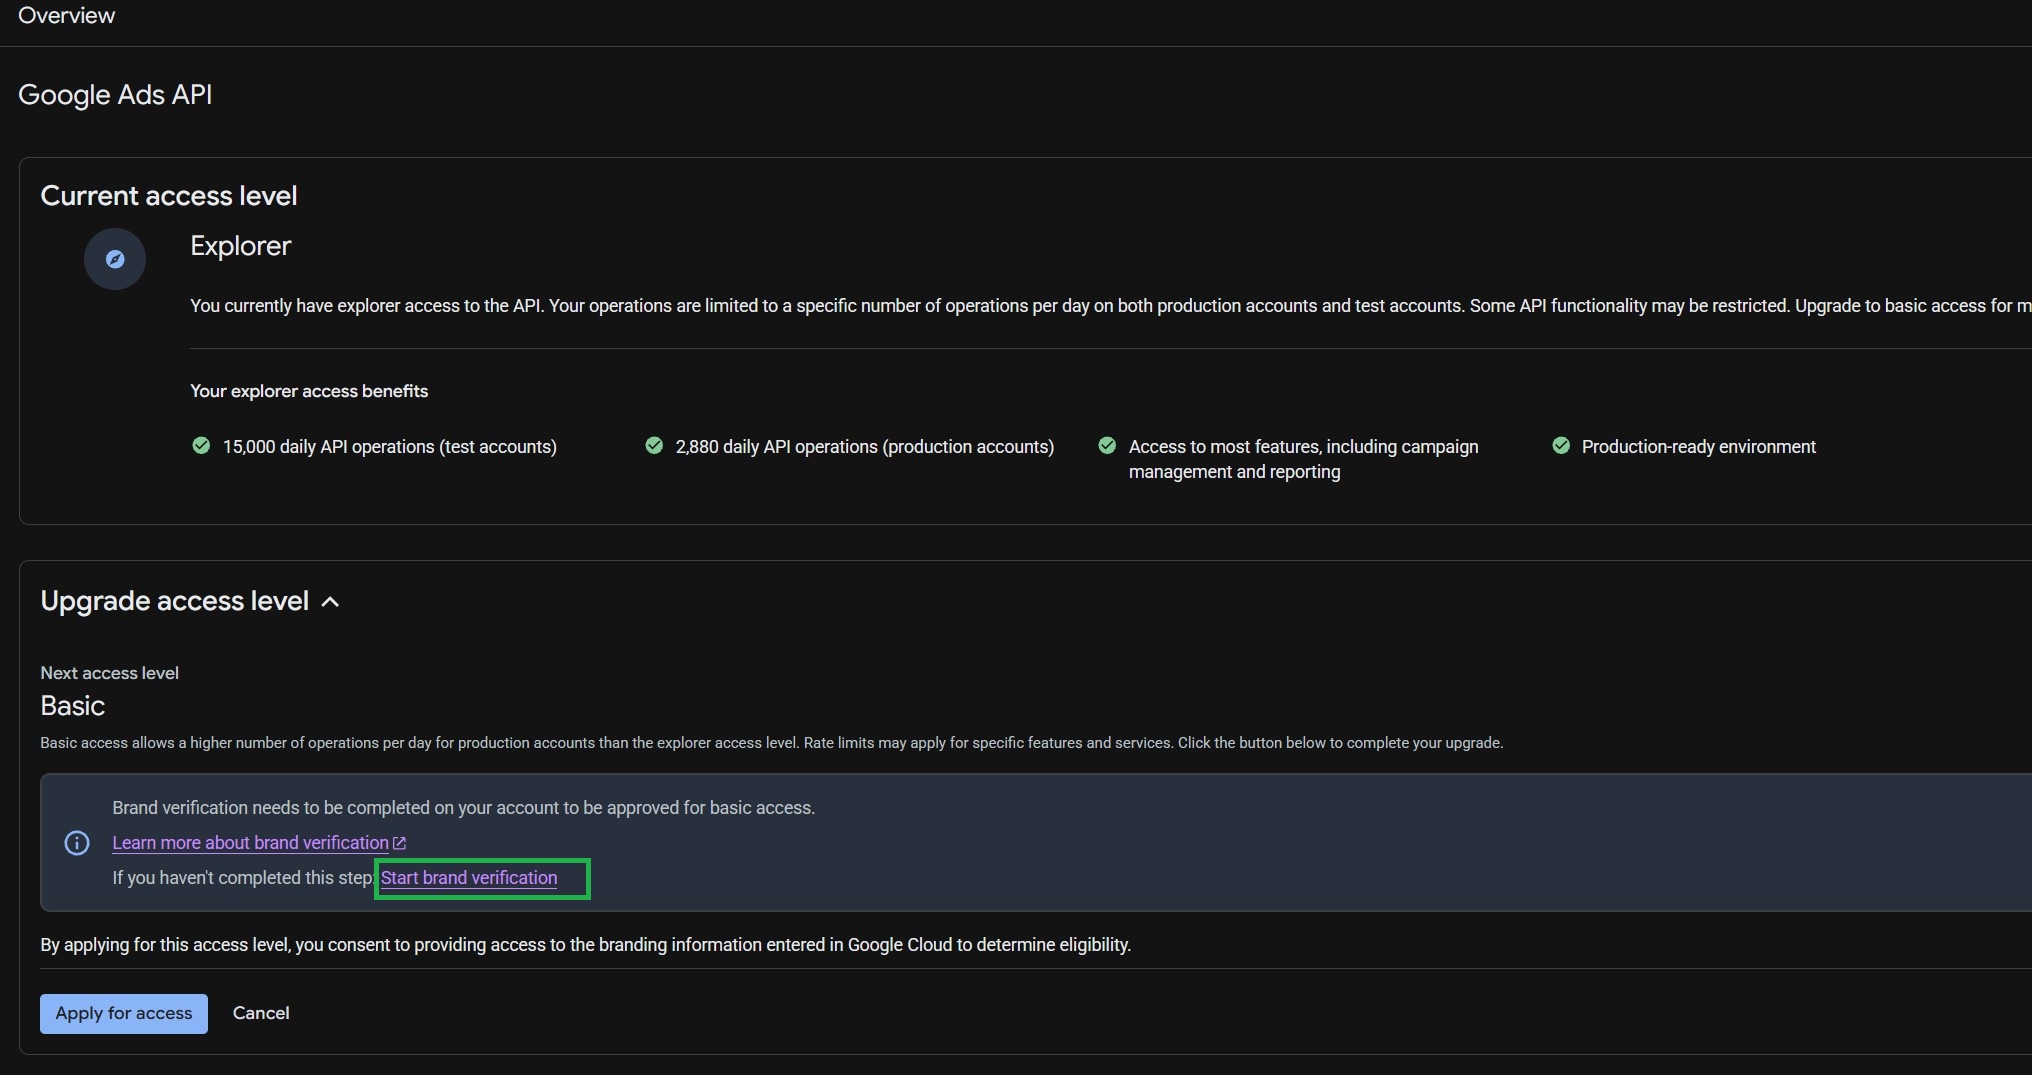
- Daily operations on production accounts: Explorer 2,880, Basic 15,000.
- Daily operations on test accounts: Explorer 15,000, Basic 15,000.
- Keyword Planner: not available on Explorer, available on Basic.
- API functionality: most of it on Explorer, all of it on Basic.
Explorer has no access to the Keyword Planner. This is not a matter of the daily limit but of scope: at this level Google switches off keyword planning, account creation, user management and billing services. In practice that means keyword research returns nothing, and the parts of custom segments and of PMax search themes that reach for the planner will not work either. The rest of the system runs normally.
Beyond that, Explorer is enough for day-to-day work on a handful of accounts. You reach for Basic when you need the planner, or when you start hitting the daily limit: with more accounts, with large reviews, or with product trees that run to thousands of items.
What you need before you start
- A Google Cloud project that already has Explorer access. You create it when you install your Claude Code app (BDOS, for example).
- Your own internet domain. The company website you already have will do.
- A privacy policy for the application, published on that domain. A template to fill in is waiting for you below.
Step 1. Publish the privacy policy
Google checks that a privacy policy describing the application asking for access really does sit at the address you give. This is the only step you carry out outside Google's console.
- Get the privacy policy template and fill in every marked field.
- Publish the finished text as a page of your website, at a stable address, for example https://yourcompany.com/application-privacy-policy/.
- Check in a browser that the page opens publicly, without a login.
Settle the application name now. You will need it in step 3, and it has to read the same way in the policy and in Google's console. The safest choice is your company name on its own, the same one that sits in your domain.
Privacy policy template
The privacy policy template you need for step 1 is a free download inside BDOS Club. Join the club and pick it up in the Free Guides section, along with the rest of the material.
Step 2. Open the Google Ads API overview
Go to the Google Ads API overview page in the Google Cloud Console: https://console.cloud.google.com/apis/api/googleads.googleapis.com/
Make sure the right project is selected at the top left, the one that has Explorer access. Expand the Upgrade access level section. You will see your current level, the next level to reach, and a note that brand verification has to be completed first. Click Start brand verification.
Step 3. Fill in the branding details
You land on the Branding page in the Google Auth Platform. Fill in the highlighted fields:
- App name: the application name, the same one that stands in your privacy policy.
- User support email: the address where a user can ask a question about their consent.
- Application home page: the address of your company website.
- Application privacy policy link: the full address of the policy page from step 1.
- Authorised domain: your domain.
- Developer contact information: the address where Google will notify you about changes to the project. Make sure somebody reads that inbox.
The Application Terms of Service link field is not required. Fill it in if you have terms of service; leave it empty if you do not. Click Save, then Verify branding in the right-hand column.
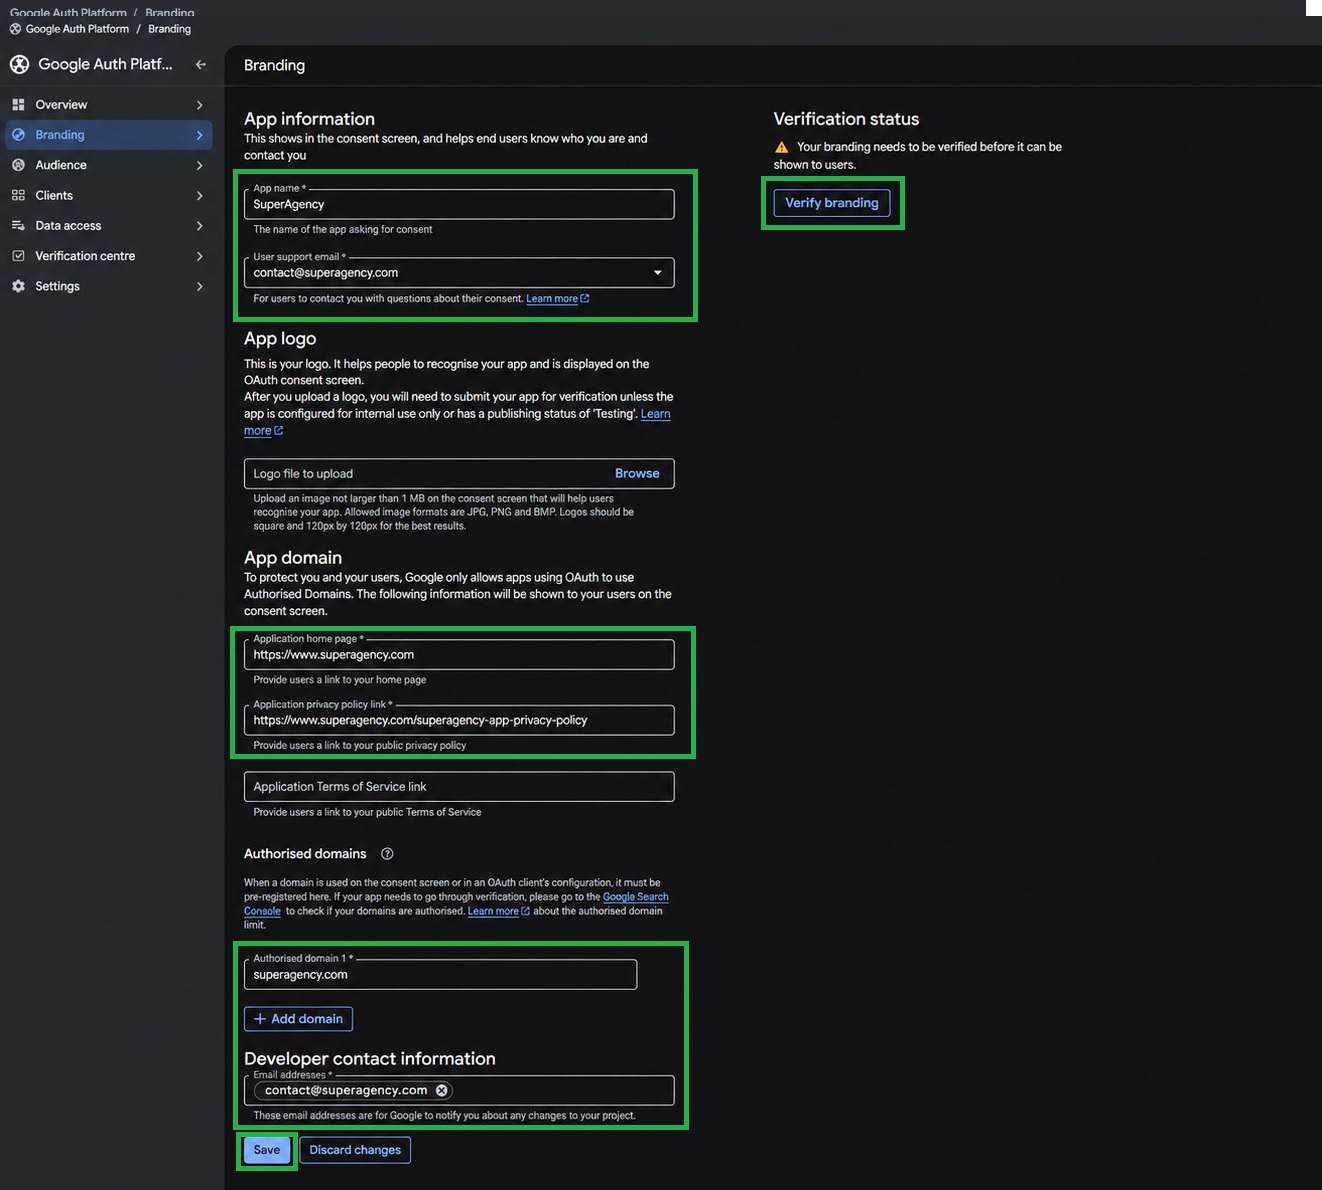
The details in the screenshot are fictitious and refer to no existing entity. In your own fields you enter your own name and your own domain.
Step 4. Wait for the verification
Once you click Verify branding the status changes to verification in progress. Google says this can take up to five minutes; in practice it is usually quicker.
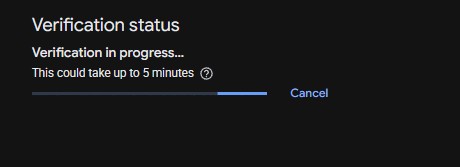
When the verification finishes, a Publish branding button appears in the same place. Click it. Without this step the branding is verified but unpublished, and the application for Basic will not go through.
Step 5. Apply for Basic
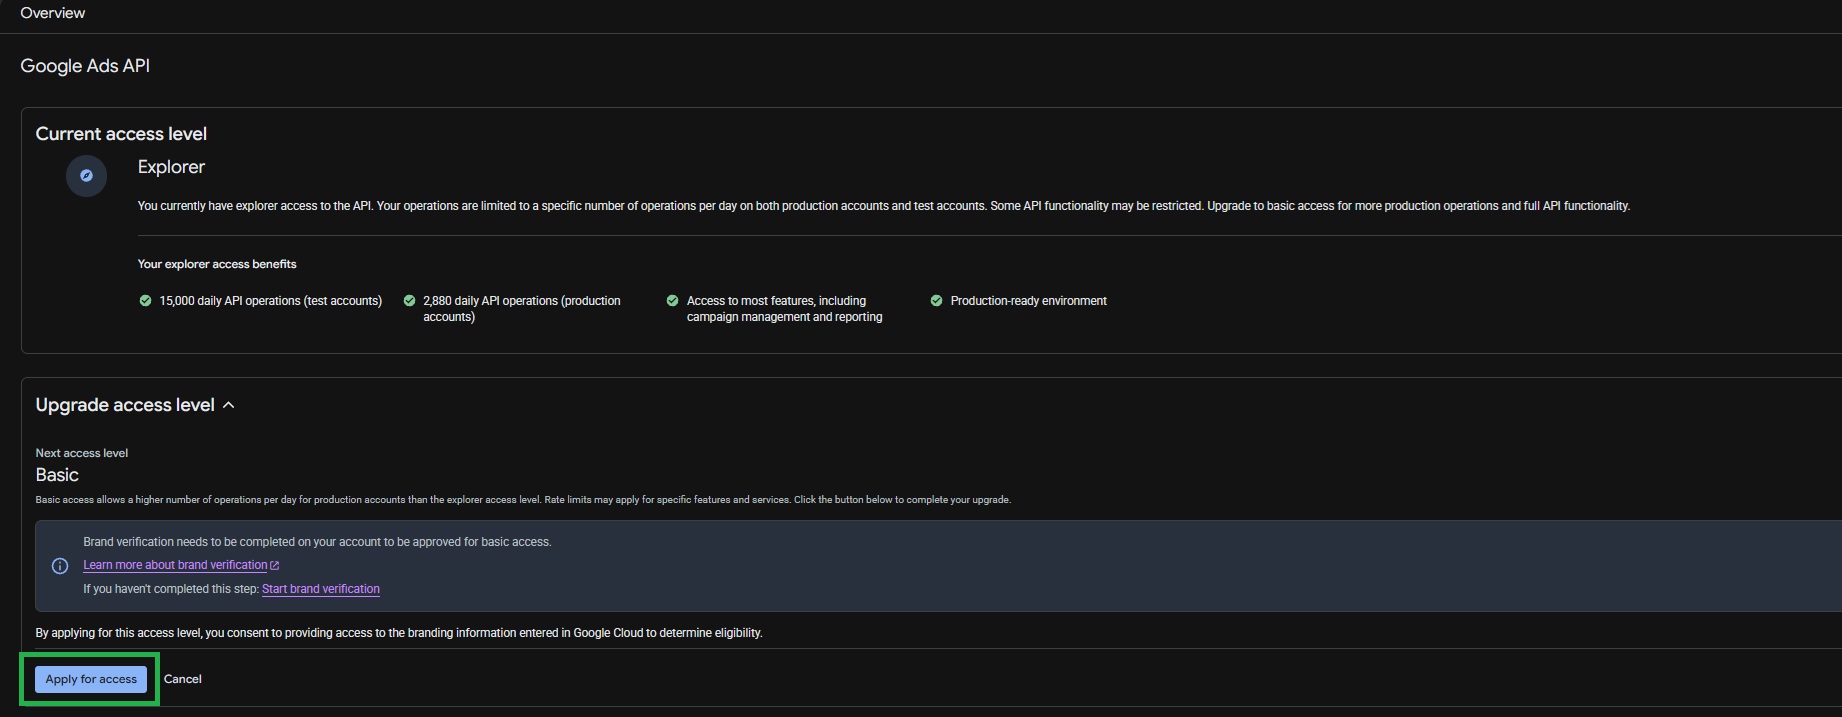
Go back to the Google Ads API overview page, the same one you started from in step 2. Expand the Upgrade access level section and click the blue Apply for access button at the bottom of it.
Step 6. Check the result
Within a few minutes you should receive a confirmation e-mail. Refresh the overview page: under Current access level you will see Basic, and the next level to reach becomes Standard.
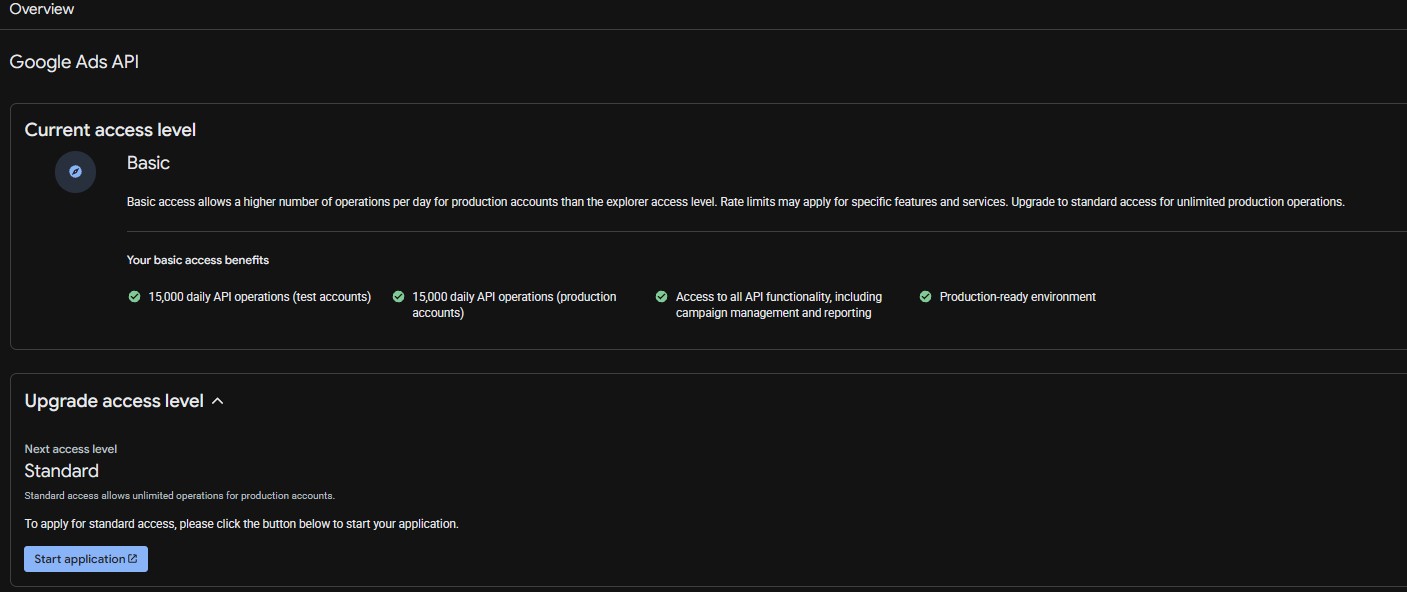
From that moment your application works with a limit of 15,000 operations a day on production accounts and with the full range of API functionality. Nothing changes in your application configuration, because the access level belongs to the Google Cloud project, not to the program.
When something does not work
The verification fails and everything looks correct
The most common cause is the application name. A name with an extra word, “superagency app” for instance, can fail where the company name on its own, the same one as in the domain, goes through without trouble. Put the plain company name in the App name field, save, and verify again. Remember to correct it in the published privacy policy as well, because the two have to match.
The verification reports that the privacy policy is not linked from your website
Add a link to the policy in the footer of your home page and verify again.
The Publish branding button does not appear
Refresh the page. If it is still missing after a few minutes, check that every required field on the Branding page is filled in and saved.
The policy address does not open publicly
Check in a private window that the page loads without a login. A page visible only once you are signed in to your site's admin panel will not pass the verification.
Keep learning with free tutorials
BDOS Club is our free community on Circle. Join to get tutorials on using AI in Google Ads — from writing useful prompts to running full campaign workflows.